Tutorials
These tutorials are also available as a pdf file.
You can also refer to the NodeBox tutorial for more help and instruction on using Spryte.
the basics +
a few more basics +
logic +
animate & interact +
libraries +
advanced +
compositing +
© info
getting started
First, download the latest version of Spryte from the downloads section.
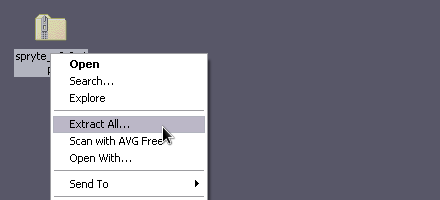
Once you have downloaded the archive (.zip) file, you can extract it to a location of your choice (the extraction process may take a while). This extracted folder can further be copied/moved to any location you like, including your flash drive. Spryte is run directly from within this folder, meaning that no installation procedure is required:
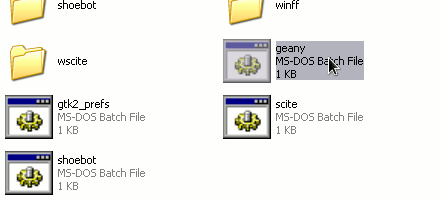
If you take a look in the newly extracted folder you will find a number of other folders as well as three run-able (.bat) files. Run the geany file to start-up the environment for writing your code (if you want to know, scite and shoebot are alternative environments to Geany; however, it is suggested that you use geany for now):
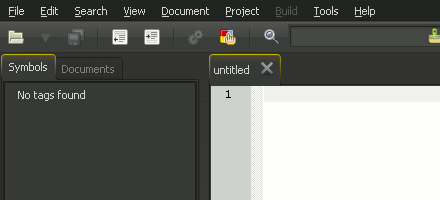
Once Geany has launched, you will be presented with a blank document to start writing your Spryte code.
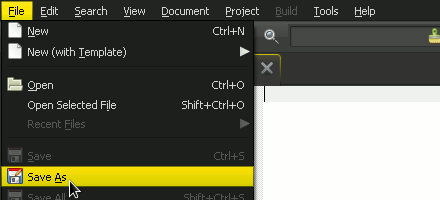
The Geany environment also supports various other programming languages, including HTML, CSS, and JavaScript. But, because you will be creating a Spryte document, you should start by saving the file as a Spryte file. To do this, select: File > Save As:
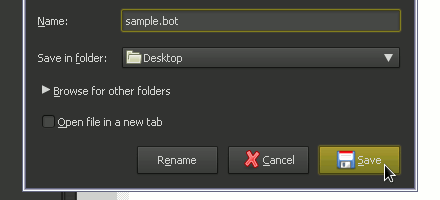
Be sure to name your file with a ".bot" extension. This is the file extension for Spryte files. By doing this, the coding environment will recognise it as a Spryte file and implement support/assistance for writing Spryte code:
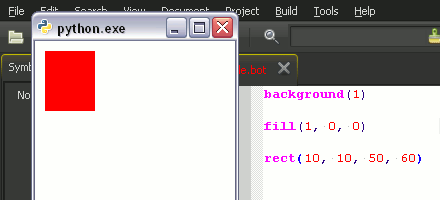
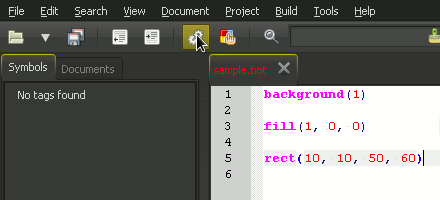
You are now ready to write your first Spryte script! In the following example, the background color has been set to white; the fill color to red; and a square rendered at an x-coordinate of 10, a y-coordinate of 10, with a width of 50px, and a height of 60px. These values are referred to as arguments.
Next, click the execute button, or use the associated shortcut key (F5):
By clicking the execute button, the visual output for the code is rendered in a new window: